Ultra fast ControlNet with 🧨 Diffusers


Ever since Stable Diffusion took the world by storm, people have been looking for ways to have more control over the results of the generation process. ControlNet provides a minimal interface allowing users to customize the generation process up to a great extent. With ControlNet, users can easily condition the generation with different spatial contexts such as a depth map, a segmentation map, a scribble, keypoints, and so on!
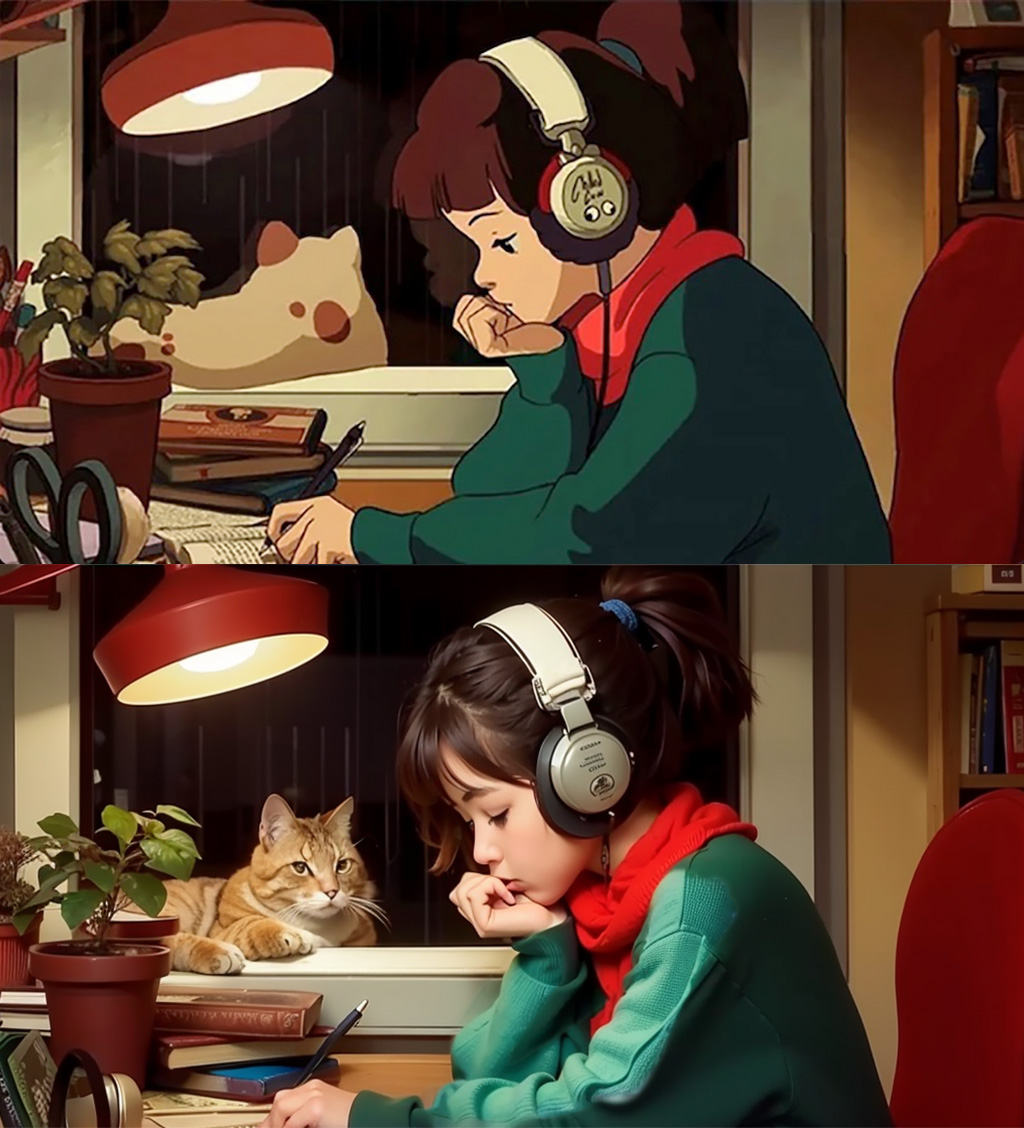
We can turn a cartoon drawing into a realistic photo with incredible coherence.
| Realistic Lofi Girl |
|---|
 |
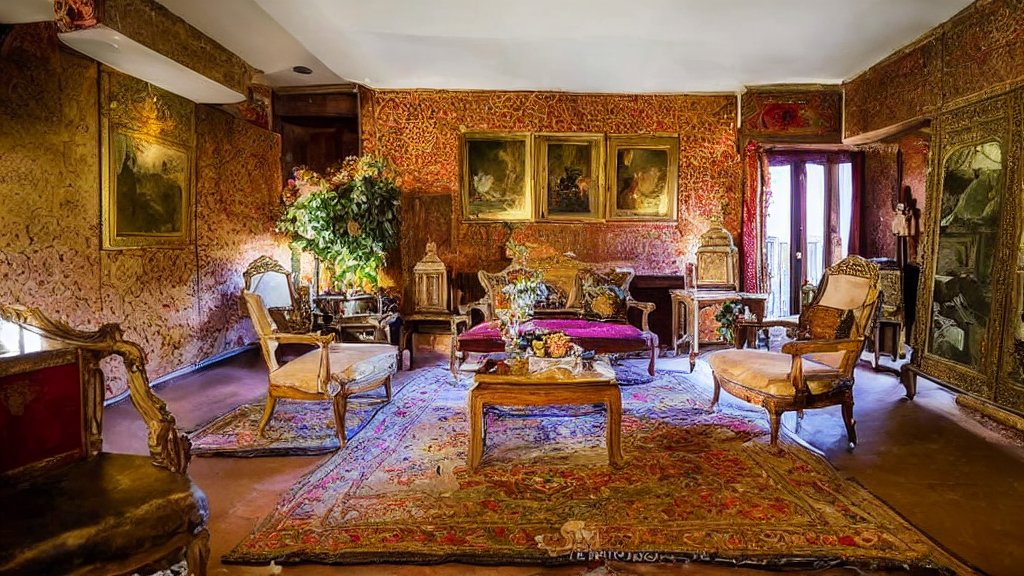
Or even use it as your interior designer.
| Before | After |
|---|---|
 |
 |
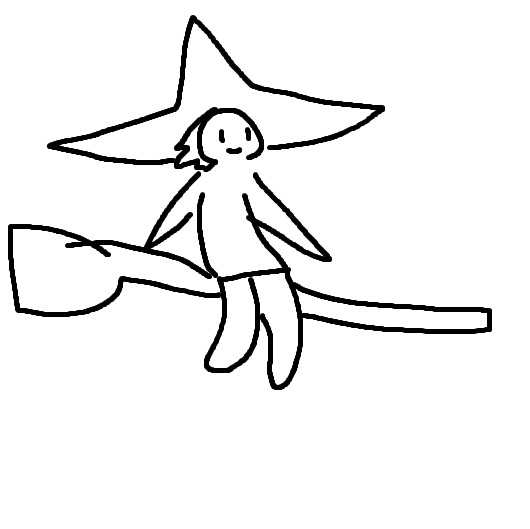
You can turn your sketch scribble into an artistic drawing.
| Before | After |
|---|---|
 |
 |
Also, make some of the famous logos coming to life.
| Before | After |
|---|---|
 |
With ControlNet, the sky is the limit 🌠
In this blog post, we first introduce the StableDiffusionControlNetPipeline and then show how it can be applied for various control conditionings. Let’s get controlling!
ControlNet: TL;DR
ControlNet was introduced in Adding Conditional Control to Text-to-Image Diffusion Models by Lvmin Zhang and Maneesh Agrawala. It introduces a framework that allows for supporting various spatial contexts that can serve as additional conditionings to Diffusion models such as Stable Diffusion. The diffusers implementation is adapted from the original source code.
Training ControlNet is comprised of the following steps:
- Cloning the pre-trained parameters of a Diffusion model, such as Stable Diffusion's latent UNet, (referred to as “trainable copy”) while also maintaining the pre-trained parameters separately (”locked copy”). It is done so that the locked parameter copy can preserve the vast knowledge learned from a large dataset, whereas the trainable copy is employed to learn task-specific aspects.
- The trainable and locked copies of the parameters are connected via “zero convolution” layers (see here for more information) which are optimized as a part of the ControlNet framework. This is a training trick to preserve the semantics already learned by frozen model as the new conditions are trained.
Pictorially, training a ControlNet looks like so:

The diagram is taken from here.
A sample from the training set for ControlNet-like training looks like this (additional conditioning is via edge maps):
| Prompt | Original Image | Conditioning |
|---|---|---|
| "bird" | 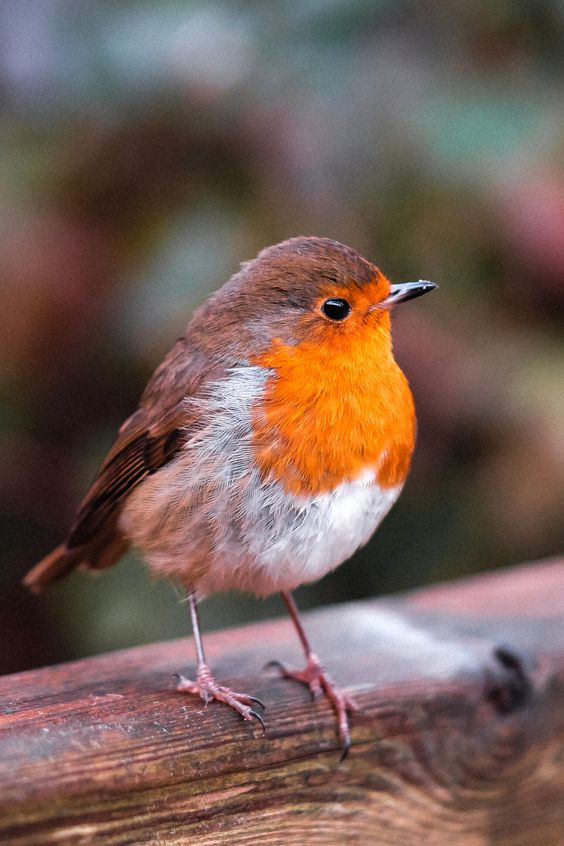 |
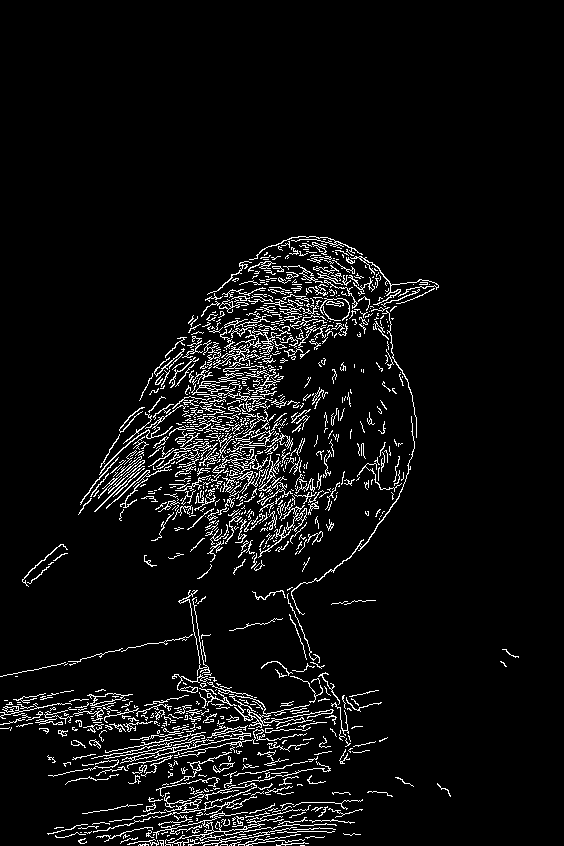 |
Similarly, if we were to condition ControlNet with semantic segmentation maps, a training sample would be like so:
| Prompt | Original Image | Conditioning |
|---|---|---|
| "big house" | 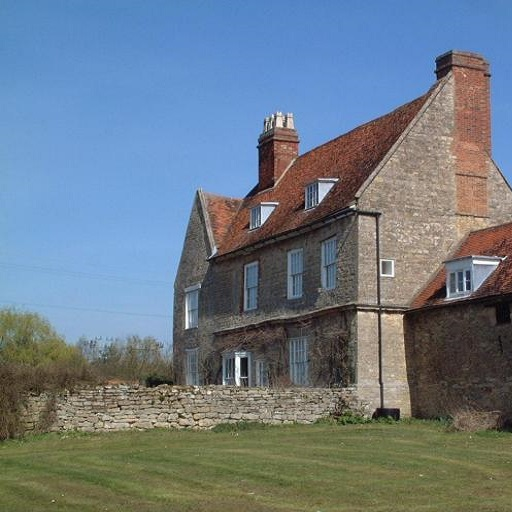 |
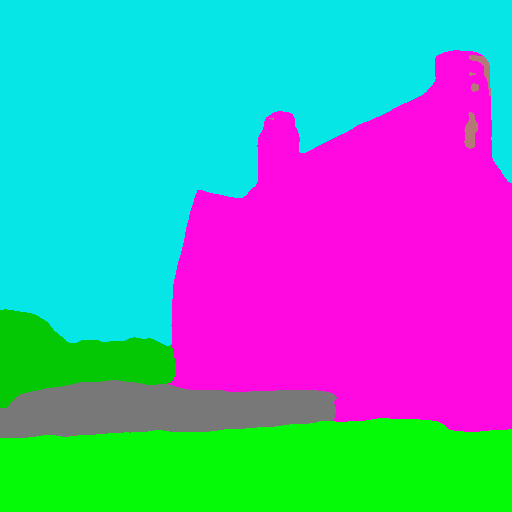 |
Every new type of conditioning requires training a new copy of ControlNet weights. The paper proposed 8 different conditioning models that are all supported in Diffusers!
For inference, both the pre-trained diffusion models weights as well as the trained ControlNet weights are needed. For example, using Stable Diffusion v1-5 with a ControlNet checkpoint require roughly 700 million more parameters compared to just using the original Stable Diffusion model, which makes ControlNet a bit more memory-expensive for inference.
Because the pre-trained diffusion models are locked during training, one only needs to switch out the ControlNet parameters when using a different conditioning. This makes it fairly simple to deploy multiple ControlNet weights in one application as we will see below.
The StableDiffusionControlNetPipeline
Before we begin, we want to give a huge shout-out to the community contributor Takuma Mori for having led the integration of ControlNet into Diffusers ❤️ .
To experiment with ControlNet, Diffusers exposes the StableDiffusionControlNetPipeline similar to
the other Diffusers pipelines. Central to the StableDiffusionControlNetPipeline is the controlnet argument which lets us provide a particular trained ControlNetModel instance while keeping the pre-trained diffusion model weights the same.
We will explore different use cases with the StableDiffusionControlNetPipeline in this blog post. The first ControlNet model we are going to walk through is the Canny model - this is one of the most popular models that generated some of the amazing images you are libely seeing on the internet.
We welcome you to run the code snippets shown in the sections below with this Colab Notebook.
Before we begin, let's make sure we have all the necessary libraries installed:
pip install diffusers==0.14.0 transformers xformers git+https://github.com/huggingface/accelerate.git
To process different conditionings depending on the chosen ControlNet, we also need to install some additional dependencies:
- OpenCV
- controlnet-aux - a simple collection of pre-processing models for ControlNet
pip install opencv-contrib-python
pip install controlnet_aux
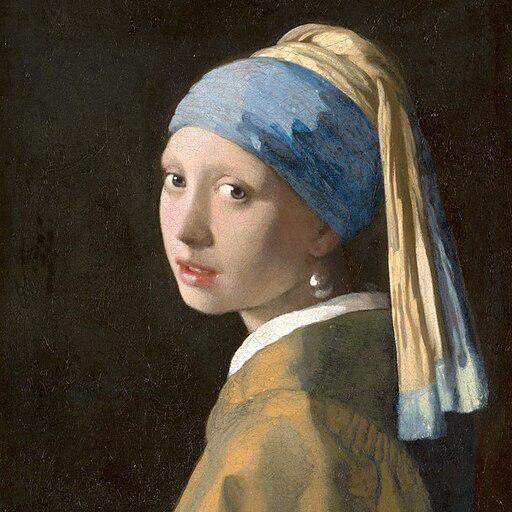
We will use the famous painting "Girl With A Pearl" for this example. So, let's download the image and take a look:
from diffusers.utils import load_image

image = load_image(
    "https://hf.co/datasets/huggingface/documentation-images/resolve/main/diffusers/input_image_vermeer.png"
)
image
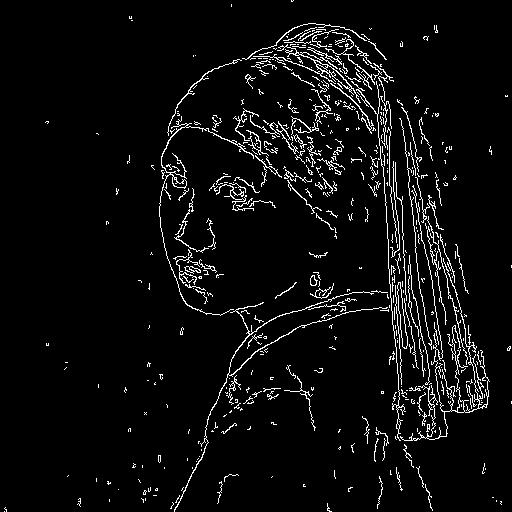
Next, we will put the image through the canny pre-processor:
import cv2
from PIL import Image
import numpy as np

image = np.array(image)

low_threshold = 100
high_threshold = 200

image = cv2.Canny(image, low_threshold, high_threshold)
image = image[:, :, None]
image = np.concatenate([image, image, image], axis=2)
canny_image = Image.fromarray(image)
canny_image
As we can see, it is essentially edge detection:
Now, we load runwaylml/stable-diffusion-v1-5 as well as the ControlNet model for canny edges.
The models are loaded in half-precision (torch.dtype) to allow for fast and memory-efficient inference.
from diffusers import StableDiffusionControlNetPipeline, ControlNetModel
import torch

controlnet = ControlNetModel.from_pretrained("lllyasviel/sd-controlnet-canny", torch_dtype=torch.float16)
pipe = StableDiffusionControlNetPipeline.from_pretrained(
    "runwayml/stable-diffusion-v1-5", controlnet=controlnet, torch_dtype=torch.float16
)
Instead of using Stable Diffusion's default PNDMScheduler, we use one of the currently fastest diffusion model schedulers, called UniPCMultistepScheduler. Choosing an improved scheduler can drastically reduce inference time - in our case we are able to reduce the number of inference steps from 50 to 20 while more or less keeping the same image generation quality. More information regarding schedulers can be found here.
from diffusers import UniPCMultistepScheduler

pipe.scheduler = UniPCMultistepScheduler.from_config(pipe.scheduler.config)
Instead of loading our pipeline directly to GPU, we instead enable smart CPU offloading which
can be achieved with the enable_model_cpu_offload function.
Remember that during inference diffusion models, such as Stable Diffusion require not just one but multiple model components that are run sequentially. In the case of Stable Diffusion with ControlNet, we first use the CLIP text encoder, then the diffusion model unet and control net, then the VAE decoder and finally run a safety checker. Most components are only run once during the diffusion process and are thus not required to occupy GPU memory all the time. By enabling smart model offloading, we make sure that each component is only loaded into GPU when it's needed so that we can significantly save memory consumption without significantly slowing down infenence.
Note: When running enable_model_cpu_offload, do not manually move the pipeline to GPU with .to("cuda") - once CPU offloading is enabled, the pipeline automatically takes care of GPU memory management.
pipe.enable_model_cpu_offload()
Finally, we want to take full advantage of the amazing FlashAttention/xformers attention layer acceleration, so let's enable this! If this command does not work for you, you might not have xformers correctly installed.
In this case, you can just skip the following line of code.
pipe.enable_xformers_memory_efficient_attention()
Now we are ready to run the ControlNet pipeline!
We still provide a prompt to guide the image generation process, just like what we would normally do with a Stable Diffusion image-to-image pipeline. However, ControlNet will allow a lot more control over the generated image because we will be able to control the exact composition in generated image with the canny edge image we just created.
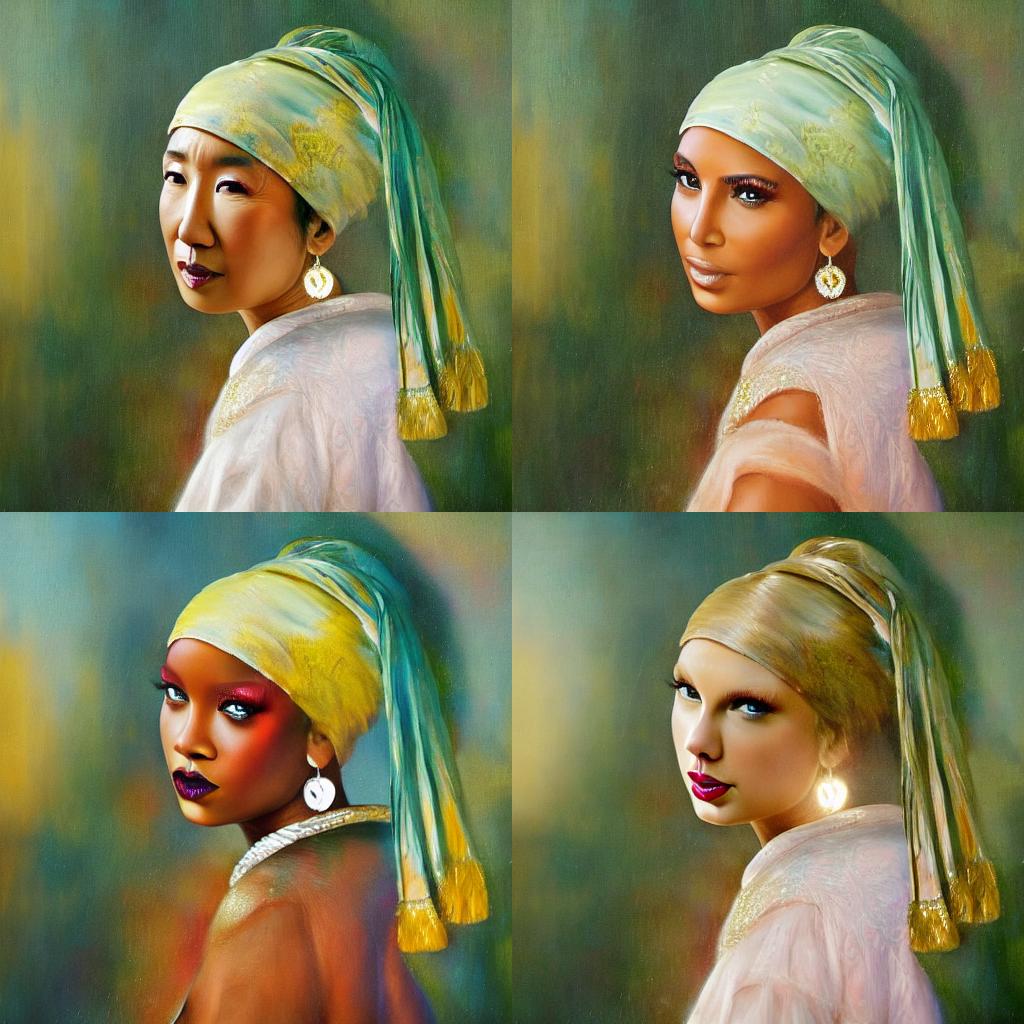
It will be fun to see some images where contemporary celebrities posing for this exact same painting from the 17th century. And it's really easy to do that with ControlNet, all we have to do is to include the names of these celebrities in the prompt!
Let's first create a simple helper function to display images as a grid.
def image_grid(imgs, rows, cols):
    assert len(imgs) == rows * cols

    w, h = imgs[0].size
    grid = Image.new("RGB", size=(cols * w, rows * h))
    grid_w, grid_h = grid.size

    for i, img in enumerate(imgs):
        grid.paste(img, box=(i % cols * w, i // cols * h))
    return grid
Next, we define the input prompts and set a seed for reproducability.
prompt = ", best quality, extremely detailed"
prompt = [t + prompt for t in ["Sandra Oh", "Kim Kardashian", "rihanna", "taylor swift"]]
generator = [torch.Generator(device="cpu").manual_seed(2) for i in range(len(prompt))]
Finally, we can run the pipeline and display the image!
output = pipe(
    prompt,
    canny_image,
    negative_prompt=["monochrome, lowres, bad anatomy, worst quality, low quality"] * 4,
    num_inference_steps=20,
    generator=generator,
)

image_grid(output.images, 2, 2)
We can effortlessly combine ControlNet with fine-tuning too! For example, we can fine-tune a model with DreamBooth, and use it to render ourselves into different scenes.
In this post, we are going to use our beloved Mr Potato Head as an example to show how to use ControlNet with DreamBooth.
We can use the same ControlNet. However, instead of using the Stable Diffusion 1.5, we are going to load the Mr Potato Head model into our pipeline - Mr Potato Head is a Stable Diffusion model fine-tuned with Mr Potato Head concept using Dreambooth 🥔
Let's run the above commands again, keeping the same controlnet though!
model_id = "sd-dreambooth-library/mr-potato-head"
pipe = StableDiffusionControlNetPipeline.from_pretrained(
    model_id,
    controlnet=controlnet,
    torch_dtype=torch.float16,
)
pipe.scheduler = UniPCMultistepScheduler.from_config(pipe.scheduler.config)
pipe.enable_model_cpu_offload()
pipe.enable_xformers_memory_efficient_attention()
Now let's make Mr Potato posing for Johannes Vermeer!
generator = torch.manual_seed(2)
prompt = "a photo of sks mr potato head, best quality, extremely detailed"
output = pipe(
    prompt,
    canny_image,
    negative_prompt="monochrome, lowres, bad anatomy, worst quality, low quality",
    num_inference_steps=20,
    generator=generator,
)
output.images[0]
It is noticeable that Mr Potato Head is not the best candidate but he tried his best and did a pretty good job in capturing some of the essence 🍟

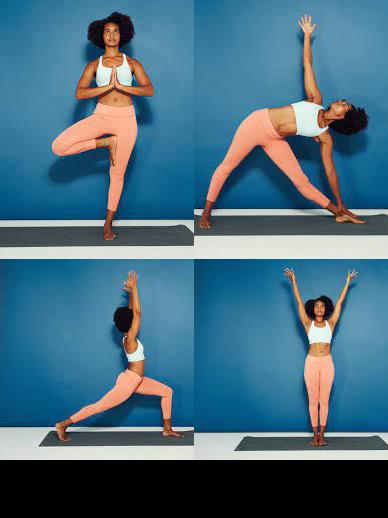
Another exclusive application of ControlNet is that we can take a pose from one image and reuse it to generate a different image with the exact same pose. So in this next example, we are going to teach superheroes how to do yoga using Open Pose ControlNet!
First, we will need to get some images of people doing yoga:
urls = "yoga1.jpeg", "yoga2.jpeg", "yoga3.jpeg", "yoga4.jpeg"
imgs = [
    load_image("https://huggingface.co/datasets/YiYiXu/controlnet-testing/resolve/main/" + url)
    for url in urls
]

image_grid(imgs, 2, 2)
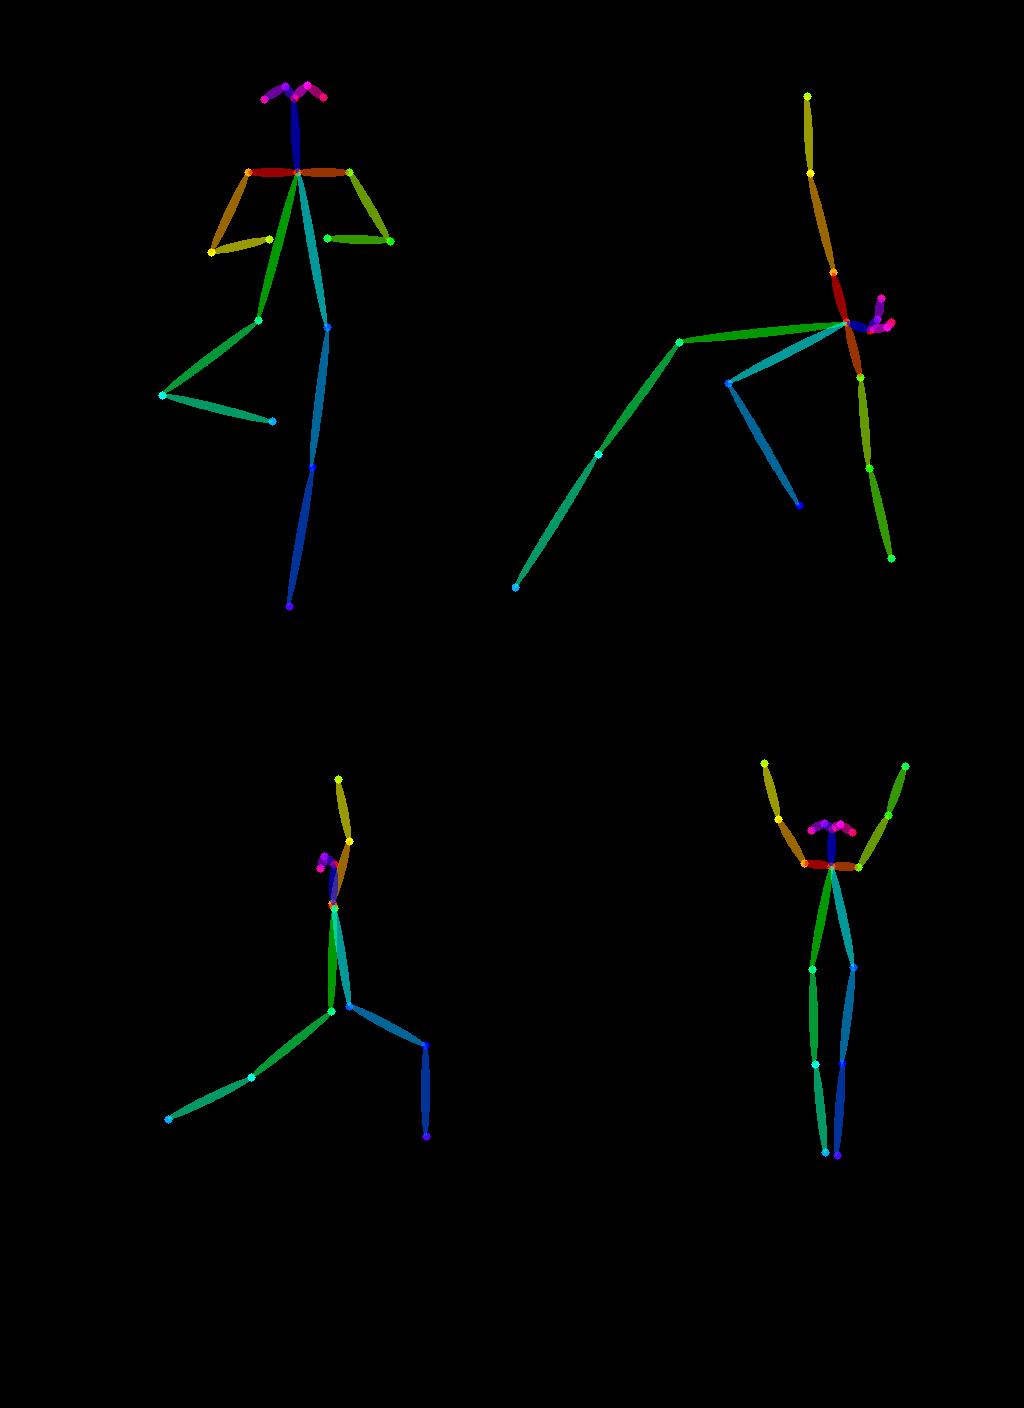
Now let's extract yoga poses using the OpenPose pre-processors that are handily available via controlnet_aux.
from controlnet_aux import OpenposeDetector

model = OpenposeDetector.from_pretrained("lllyasviel/ControlNet")

poses = [model(img) for img in imgs]
image_grid(poses, 2, 2)
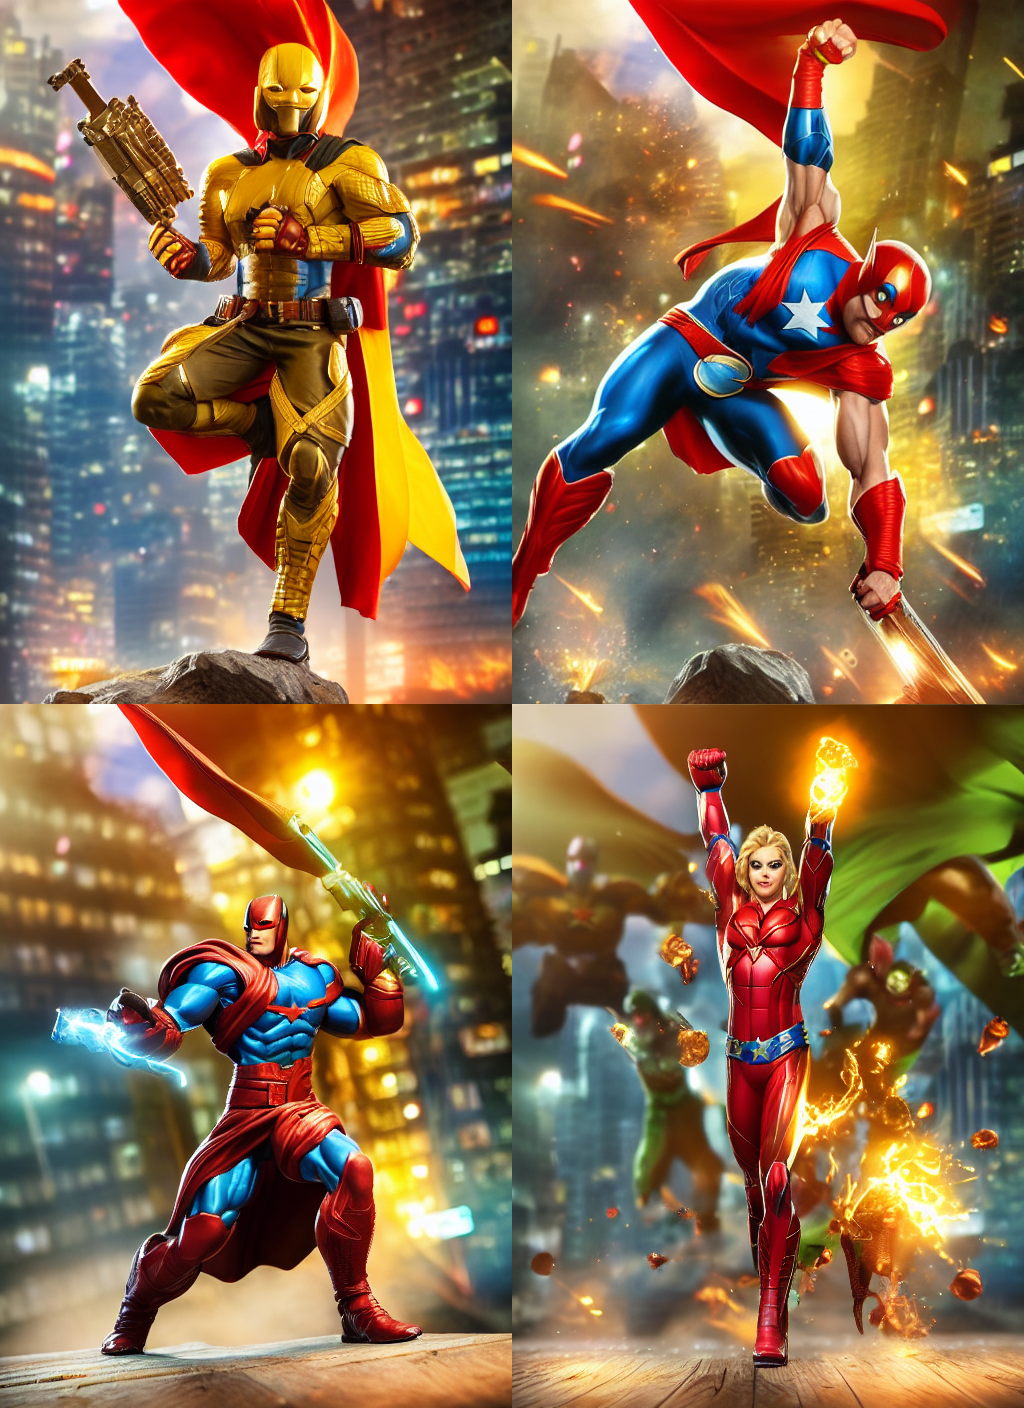
To use these yoga poses to generate new images, let's create a Open Pose ControlNet. We will generate some super-hero images but in the yoga poses shown above. Let's go 🚀
controlnet = ControlNetModel.from_pretrained(
    "fusing/stable-diffusion-v1-5-controlnet-openpose", torch_dtype=torch.float16
)

model_id = "runwayml/stable-diffusion-v1-5"
pipe = StableDiffusionControlNetPipeline.from_pretrained(
    model_id,
    controlnet=controlnet,
    torch_dtype=torch.float16,
)
pipe.scheduler = UniPCMultistepScheduler.from_config(pipe.scheduler.config)
pipe.enable_model_cpu_offload()
Now it's yoga time!
generator = [torch.Generator(device="cpu").manual_seed(2) for i in range(4)]
prompt = "super-hero character, best quality, extremely detailed"
output = pipe(
    [prompt] * 4,
    poses,
    negative_prompt=["monochrome, lowres, bad anatomy, worst quality, low quality"] * 4,
    generator=generator,
    num_inference_steps=20,
)
image_grid(output.images, 2, 2)
Combining multiple conditionings
Multiple ControlNet conditionings can be combined for a single image generation. Pass a list of ControlNets to the pipeline's constructor and a corresponding list of conditionings to __call__.
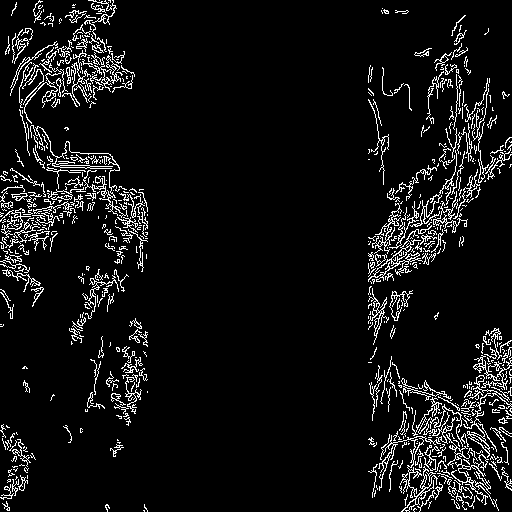
When combining conditionings, it is helpful to mask conditionings such that they do not overlap. In the example, we mask the middle of the canny map where the pose conditioning is located.
It can also be helpful to vary the controlnet_conditioning_scales to emphasize one conditioning over the other.
Canny conditioning
The original image

Prepare the conditioning
from diffusers.utils import load_image
from PIL import Image
import cv2
import numpy as np
from diffusers.utils import load_image

canny_image = load_image(
    "https://huggingface.co/datasets/huggingface/documentation-images/resolve/main/diffusers/landscape.png"
)
canny_image = np.array(canny_image)

low_threshold = 100
high_threshold = 200

canny_image = cv2.Canny(canny_image, low_threshold, high_threshold)

# zero out middle columns of image where pose will be overlayed
zero_start = canny_image.shape[1] // 4
zero_end = zero_start + canny_image.shape[1] // 2
canny_image[:, zero_start:zero_end] = 0

canny_image = canny_image[:, :, None]
canny_image = np.concatenate([canny_image, canny_image, canny_image], axis=2)
canny_image = Image.fromarray(canny_image)
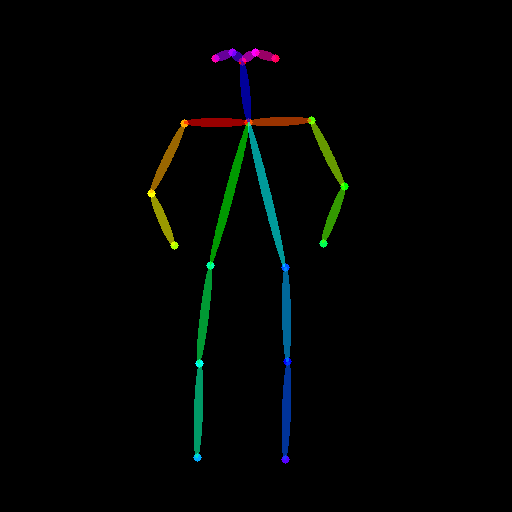
Openpose conditioning
The original image
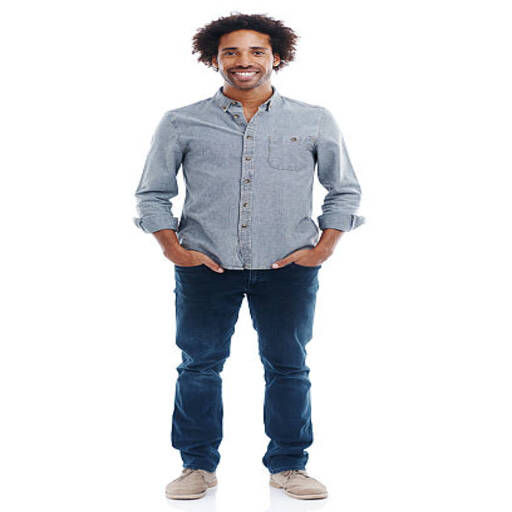
Prepare the conditioning
from controlnet_aux import OpenposeDetector
from diffusers.utils import load_image

openpose = OpenposeDetector.from_pretrained("lllyasviel/ControlNet")

openpose_image = load_image(
    "https://huggingface.co/datasets/huggingface/documentation-images/resolve/main/diffusers/person.png"
)
openpose_image = openpose(openpose_image)
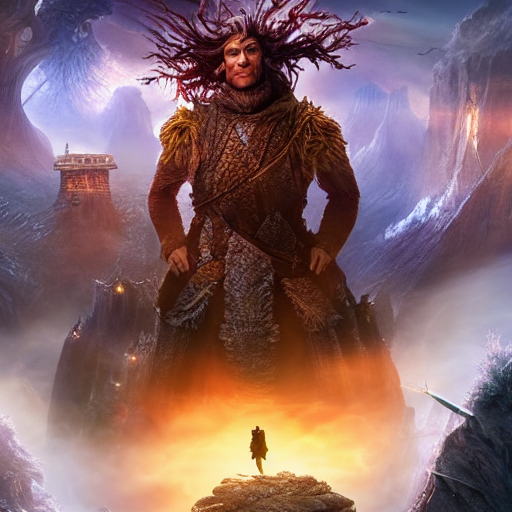
Running ControlNet with multiple conditionings
from diffusers import StableDiffusionControlNetPipeline, ControlNetModel, UniPCMultistepScheduler
import torch

controlnet = [
    ControlNetModel.from_pretrained("lllyasviel/sd-controlnet-openpose", torch_dtype=torch.float16),
    ControlNetModel.from_pretrained("lllyasviel/sd-controlnet-canny", torch_dtype=torch.float16),
]

pipe = StableDiffusionControlNetPipeline.from_pretrained(
    "runwayml/stable-diffusion-v1-5", controlnet=controlnet, torch_dtype=torch.float16
)
pipe.scheduler = UniPCMultistepScheduler.from_config(pipe.scheduler.config)

pipe.enable_xformers_memory_efficient_attention()
pipe.enable_model_cpu_offload()

prompt = "a giant standing in a fantasy landscape, best quality"
negative_prompt = "monochrome, lowres, bad anatomy, worst quality, low quality"

generator = torch.Generator(device="cpu").manual_seed(1)

images = [openpose_image, canny_image]

image = pipe(
    prompt,
    images,
    num_inference_steps=20,
    generator=generator,
    negative_prompt=negative_prompt,
    controlnet_conditioning_scale=[1.0, 0.8],
).images[0]

image.save("./multi_controlnet_output.png")
Throughout the examples, we explored multiple facets of the StableDiffusionControlNetPipeline to show how easy and intuitive it is play around with ControlNet via Diffusers. However, we didn't cover all types of conditionings supported by ControlNet. To know more about those, we encourage you to check out the respective model documentation pages:
- lllyasviel/sd-controlnet-depth
- lllyasviel/sd-controlnet-hed
- lllyasviel/sd-controlnet-normal
- lllyasviel/sd-controlnet-scribble
- lllyasviel/sd-controlnet-seg
- lllyasviel/sd-controlnet-openpose
- lllyasviel/sd-controlnet-mlsd
- lllyasviel/sd-controlnet-canny
We welcome you to combine these different elements and share your results with @diffuserslib. Be sure to check out the Colab Notebook to take some of the above examples for a spin!
We also showed some techniques to make the generation process faster and memory-friendly by using a fast scheduler, smart model offloading and xformers. With these techniques combined the generation process takes only ~3 seconds on a V100 GPU and consumes just ~4 GBs of VRAM for a single image ⚡️ On free services like Google Colab, generation takes about 5s on the default GPU (T4), whereas the original implementation requires 17s to create the same result! Combining all the pieces in the diffusers toolbox is a real superpower 💪
Conclusion
We have been playing a lot with StableDiffusionControlNetPipeline, and our experience has been fun so far! We’re excited to see what the community builds on top of this pipeline. If you want to check out other pipelines and techniques supported in Diffusers that allow for controlled generation, check out our official documentation.
If you cannot wait to try out ControlNet directly, we got you covered as well! Simply click on one of the following spaces to play around with ControlNet:

